UPDATE (October 2026): the original install command has been replaced. This post was written in August 2019 and told you to run a setup script from my personal Bitbucket repo:
curl -sSL https://bitbucket.org/dellarb/ardupilot-sitl/raw/master/sitl_install.sh | sudo bash
Do not run that, and please don’t run anything shaped like it. Three things were wrong with it: it piped a remote script straight into sudo bash, the script targeted Ubuntu 14.04 (end-of-life since 2019), and it pointed at a personal repo that is no longer maintained. ArduPilot moved to GitHub years ago, and the project maintains its own supported setup script. The instructions below now use that instead.
For those who use and develop using the ArduPilot autopilot software (as featured on DIY Drones and ArduPilot Discourse), a powerful simulation tool is available that can replicate all of the features of the autopilot without flying an actual aircraft. This is extremely useful for testing complex missions or parameter configurations without risking real hardware.
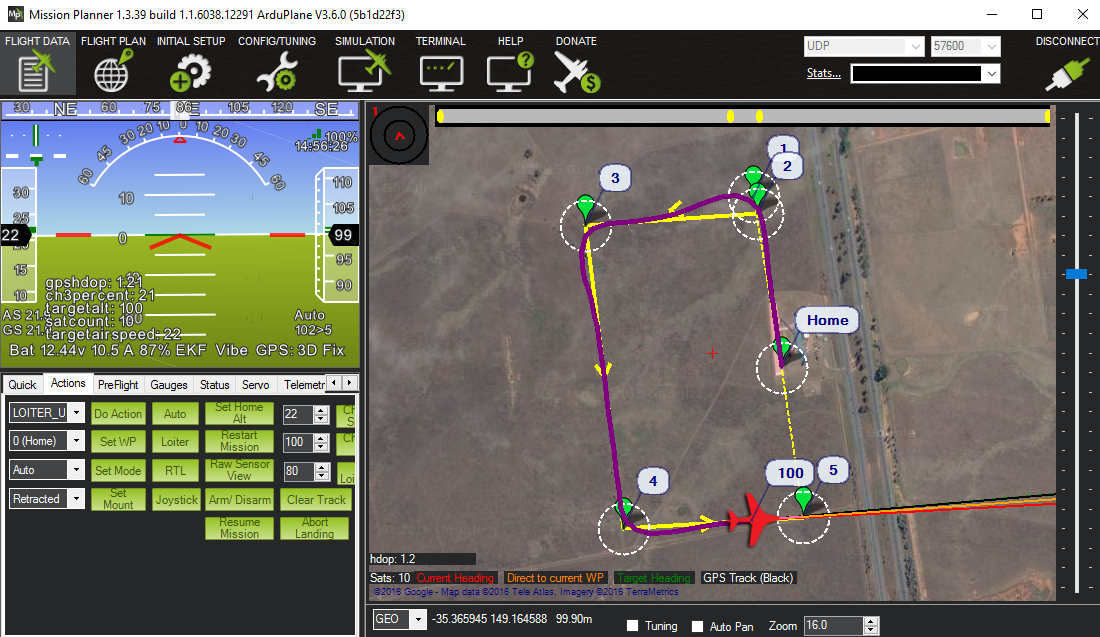
Setting it up used to be a bit tricky. The official instructions are at Setting up SITL on Linux, and the source lives at github.com/ArduPilot/ardupilot.
Installation Instructions
These steps assume a current Ubuntu LTS. ArduPilot’s own setup script states it does not support releases that have reached end of standard support — so Ubuntu 20.04 LTS and older are out; 22.04 or 24.04 are the sensible choices. Run these as your normal user — not with sudo. The prereq script asks for your password itself where it needs to.
- Install git and clone ArduPilot:
sudo apt install -y git gitk git-gui
git clone --recurse-submodules https://github.com/ArduPilot/ardupilot.git
cd ardupilot
- Run the project’s own prerequisite installer. This is the supported equivalent of the old script:
Tools/environment_install/install-prereqs-ubuntu.sh -y
- Reload your shell so the toolchain paths take effect (log out and back in to make it permanent):
. ~/.profile
- Confirm the build works before trying to fly anything. This is the quickest way to catch a broken toolchain:
./waf configure --board sitl
./waf copter
- Launch the simulator. The
-wflag wipes the virtual EEPROM and loads default parameters for the vehicle, so use it the first time you launch a given frame:sim_vehicle.py -v ArduCopter --console --map -w
You should get a MAVProxy console and a map window, with the simulated vehicle sitting at the default CMAC location.
-v ArduPlaneor-v Roverwill load the other vehicles.
If the map tiles don’t load, change the provider from the map window via View / Service, or export MAP_SERVICE="MicrosoftHyb" from your .bashrc to make it stick.
A note on safety
Nothing in SITL touches real hardware — it’s a pure software build, which is exactly why it’s worth running before you fly. Two habits worth keeping:
- Clone and build from the official ArduPilot repository only. If a setup guide asks you to pipe a script you haven’t read into
sudo bash, that’s the guide being convenient at your expense — download it, read it, then run it. - If you also fly real aircraft, test parameter changes in SITL first. A bad parameter set that reboots mid-flight in the sim costs you nothing.
If you encounter any errors please leave a comment below with as many details as you can provide — and include the output of ./waf configure --board sitl if it’s a build problem, since that names the missing dependency in almost every case.
Leave a Reply